Why is this still a “draft”. Two reasons: 1) I have yet to take pictures that I’m happy about and 2) I need to go through and re-measure the ingredient amounts. Make sure to taste everything to fix any issues that still might be buried in here. (oh, other than that, this is a great recipe!)
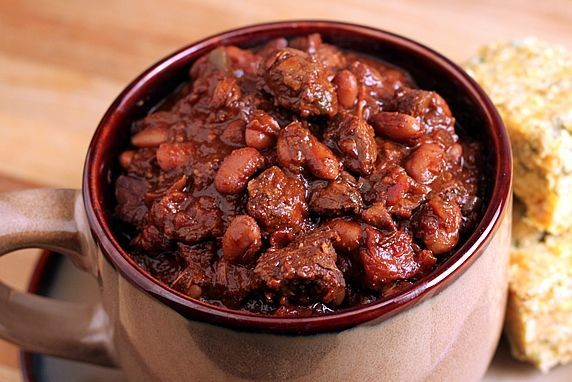
*See, this top pic isn’t mine. I need better pics for this post!
I love making chili. Every year I threaten to take this recipe to the state fair. The secret…start with a whole roast! I basically render down a big roast beef to make an pulled beef chili. I also don’t use chili powder, but instead use a chili paste made from dried chilis. I have family that lives in southern San Diego and whenever I visit, I like to skip across the border for an afternoon and walk the open air markets in Tijuana. There is a great one a few blocks from the border and I tend to be the only gringo there. I love to take in the sites and smells, and bargain with the different vendors over the great supplies of bulk produce and spices. I always come back with bags of dried chilis, cocoa beans, banana leaves, and more! I use the chilis to make a smoky, spicy chili paste. I pretty much have some in my fridge at all times and use it for enchiladas, tamales, posole, tortilla soup, salsa base, and of course, chili.

Browning the roast

Leave it on one side without touching for long enough for it to brown, then flip

Deglazing the pan

Into the crock pot everything goes

Top with chili paste

Stewing veggies

Add the beans towards the end
Beef Chili
4-5 lb – Beef roast (chuck or blade will do)
1/2 cup – Chili paste (recipe below)
2 large – Onions, diced
2 – Poblano chilis, deseeded, deveined, and diced
1 – Jalapeno, deseeded, deveined, and diced
1 cup – Red wine
3 cups – Beef stock
3 cups – Stewed tomatoes, diced (about a 10 ounce can)
1/4 cup – brown sugar
2 Tbsp. – Molasses
1 tsp. – Fresh ground cumin
1/2 tsp. – Fresh ground coriander
2 – Bay leaves
2 Tbsp. – Fresh thyme, minced
6 cups – Pinto beans (or I like a mixture of pinto, red, black, and kidney beans), cooked, liquid reserved
1/2 cup – Masa corn flour
Apple Cider vinegar
Salt
Pepper
Olive oil
1 bunch – Fresh cilantro, minced
2 cups – Sour cream (crema agria)
1 cup – Cotija cheese, crumbled
To cook the beans
1) (Skip steps 1-2 if using canned beans) Rinse the 3-4 cups of dry beans, then place in a large bowl. Add water until covered by about 2 inches of water (the bean will predominately sink to the bottom). Soak overnight.
2) Add beans and liquid to a large pressure cooker. Add an additional 4 cups of water and 1 tsp. of vinegar. Cover and cook under pressure for 45 minutes or until tender. Reserve liquid.
Chili
1) Heat a large pan or Dutch oven on medium high heat.
2) Generously salt and pepper the roast. Add a Tbsp of olive oil to the pan and brown the beef, about 2-3 minutes on each side until well brown.
3) Place the roast in a crock pot or set aside. Deglaze the pan by adding red wine and cooking on high heat until the liquid reduces by half.
4) If using a crock pot, pour onions, peppers, and tomatoes on top of the roast (otherwise, kill the heat and add these things to your original pot). Pour reduced wine liquid and broth over the top of everything.
5) Add sugar, molasses, spices, and bay leaves. Set crock pot to high (or cover Dutch oven and place in a 325 degree oven) and braise for 4-5 hours. I like to flip the roast once in the middle.
6) Once the roast is falling apart (fully rendered), remove from heat and let cool completely.
7) Heat a large pot. Add everything but the roast to the pot from the braising pan (or crock pot). Add beans, vinegar. Bring to a simmer, let simmer for 10-20 minutes. Add vinegar, salt, and pepper to taste. If you want it spicier, add a pinch of cayenne at a time until to reach your liking. After everything is cooked down and well seasoned, add the masa flour by adding the flour to a small bowl with 1/2 of water, stir to make a paste. Add the paste to the chili and stir until well combined. Make sure the chili comes to a simmer again before serving.
8) When you are ready to serve, cube the cooled roast into 1 inch cubes and gently stir into the chili. Be careful not to overstir from this point on, if you want any form of definition of the beef in the chili. Otherwise it will all mix in until you just see strands of pulled beef mixed in.
9) Serve, topped with sour cream (crema agria), cilantro, and cotija cheese.
Chili Paste
6-10 – Dried ancho, guajillo, california, and piquin chilis (I mess with this mixture all of the time. More spice, add piquin. More smoke, add guajillo. You can just use what you can find in the grocery store)
2 cloves – Fresh garlic, chopped
1 Tbsp. – Oregano
1 tsp. – Cinnamon (Mexican cinnamon is better)
1 tsp. – Salt
1) Rinse the chilis then soak in near boiling water for 10-20 minutes or until very soft. Reserve the liquid.
2) Carefully remove the stems, veins, and seeds.
3) Add chilis to a blender, along with remaining ingredients and 1/2 cup of the soaking liquid.
4) Blend until smooth and thick. If it is too thick to mix in the blender, add more soaking liquid.
5) Place in a clean glass jar. Keeps for 2-3 weeks in the fridge.


